XAMPP for Windows
GeneralIf you’ve spent any time at all developing websites on Windows, you’ve undoubtedly been through the process of installing Apache, and possibly PHP and MySQL. If you’re like me, you’ve done it countless times over the years, but still far enough apart to forget the little details, which eventually leads to a nightmare of permissions issues, missing configuration files and dodgy modules that fail to load.
I knew there was an ‘all in one’ package out there, but the control freak in me never let me try it out, until today! Perhaps I could save myself countless hours by using a package that combines Apache, PHP and MySQL.
That’s exactly what XAMPP does. Built by the good folks over at www.apachefriends.org, the latest version of XAMPP bundles Apache 2.2, PHP5, and MySQL 5.1, and it even includes some admin tools such as phpMyAdmin, Perl, FileZilla FTP Server and Mercury Mail Transport System (for SMTP).
Naturally a tool combining so many servers can get out of date quickly, so it’s instantly noticeable that this tool isn’t ideal for production use, and that’s exactly what the author’s state on the site – that XAMPP is as open as it gets, and should only be used in a development environment. That’s what I was keen to do, so I got installing.
XAMPP is configured is to be as open as possible and to allow the web developer anything he/she wants. For development environments this is great but in a production environment it could be fatal.
I chose to give XAMPP a try on Windows because Linux makes easy work of the packages separately. Windows is the one that really isn’t designed to handle these kinds of services (including Windows Server!), so it makes sense to try it on the platform that could benefit the most from it.
This guide lists my first impressions of XAMPP.
Installing
XAMPP for Windows comes in two flavours, the self extracting RAR format, or simple ZIP. The authors recommend the self extracting download, probably because it includes the setup batch file which does all the config for you. I agreed and opted to download the 51MB file.
My test machine was a Windows XP desktop running Service Pack 3. I downloaded XAMPP 1.7.3 and installed into the default C:\ location. After extracting countless files, I was presented with the batch setup script:
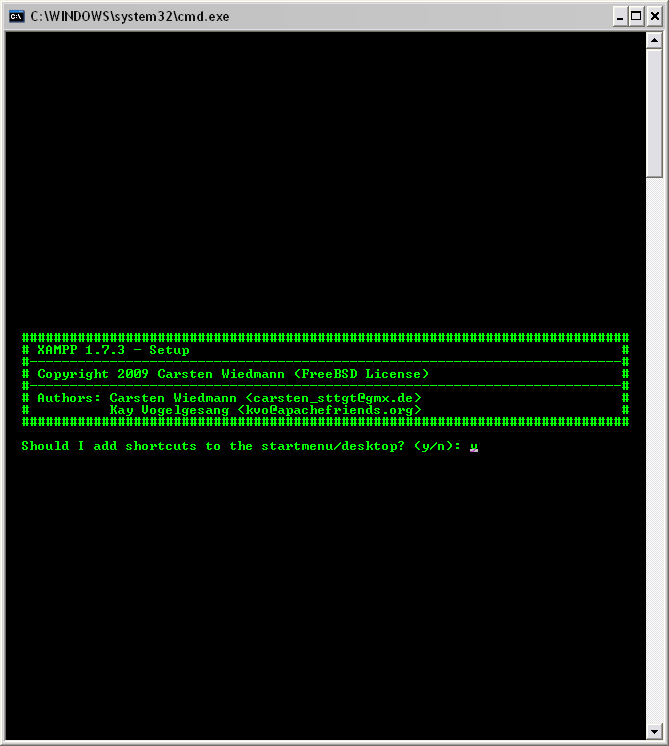
The setup asks the usual questions in a friendly simplified manor (with the exception of question two, “Should I locate the XAMPP paths correctly” – bit of a no brainer?), we liked the ability to make XAMPP portable, but not for this test. Instead we went with all the defaults, and everything seemed to go according to plan.
Once completed, the time zone was set (a nice little touch to prevent PHP from complaining when using certain functions), we were in!
The last option allows you to display the XAMPP control panel – a nice little application which controls the starting, stopping, and overall status of the applications.
A quick check on the Windows Services page shows no services have been installed yet; presumably this is a manual step as XAMPP doesn’t want to assume. TcpView also shows no listening services from Apache or MySQL just yet either. It’s a nice touch that not all services are started once the installation completes as this could easily overwhelm users not accustomed to server software, and would also pose a great security risk to improperly configured networks. In fact, the website is quite clear about the risks. Ensuring you have a NAT router in place which is blocking incoming connections, you should be OK.
The Control Panel
Since only the control panel was up and running, we had a look around the different options. Obvious buttons allow you to start and stop the servers, each server is started as a standalone application, and the ‘admin’ button opens the appropriate interface, phpMyAdmin for MySQL, the FileZilla Interface and Mercury’s own admin tool – all contained within the parent XAMPP folder.
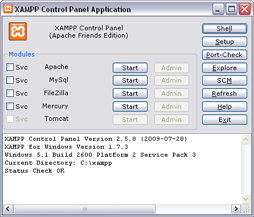
What we did find a little confusing was the ‘Svc’ tick boxes which allow you to register the appropriate sever as a Windows service. Why they chose tick boxes I don’t know, ticking prompts to install the server as a service, providing the server isn’t running. Doing so places the application in the Services list, with a start up type of ‘Automatic’ so that the server is available on start up, but doesn’t start straight away.
We found the relation between the Windows Services page and the XAMPP control panel worked perfectly, starting in one updated in the other, and vice-versa.
The remaining functions on XAMPP are tailored perfectly for your needs:
Shell Loads a Windows Command prompt which is geared towards the XAMPP installation directory along with all the environment variables required for the servers. You can also start\stop the servers and perform most of the tasks of the Control Panel from here.
Setup Runs through the batch file setup again, which allows you to move the XAMPP directory, and enable\disable features such as modules, IPv6 etc.
Port-Check A neat little application that details what ports are in use by which application, and which ones are free. Ideal troubleshooting tool to determine why servers may not be able to start.
Explore Loads the XAMPP installation directory in Windows Explorer.
SCM Loads the Windows Services page.
The Refresh, Help and Exit buttons are somewhat self explanatory, though it would be nice to have a ‘restart’ button for the services.
Apache
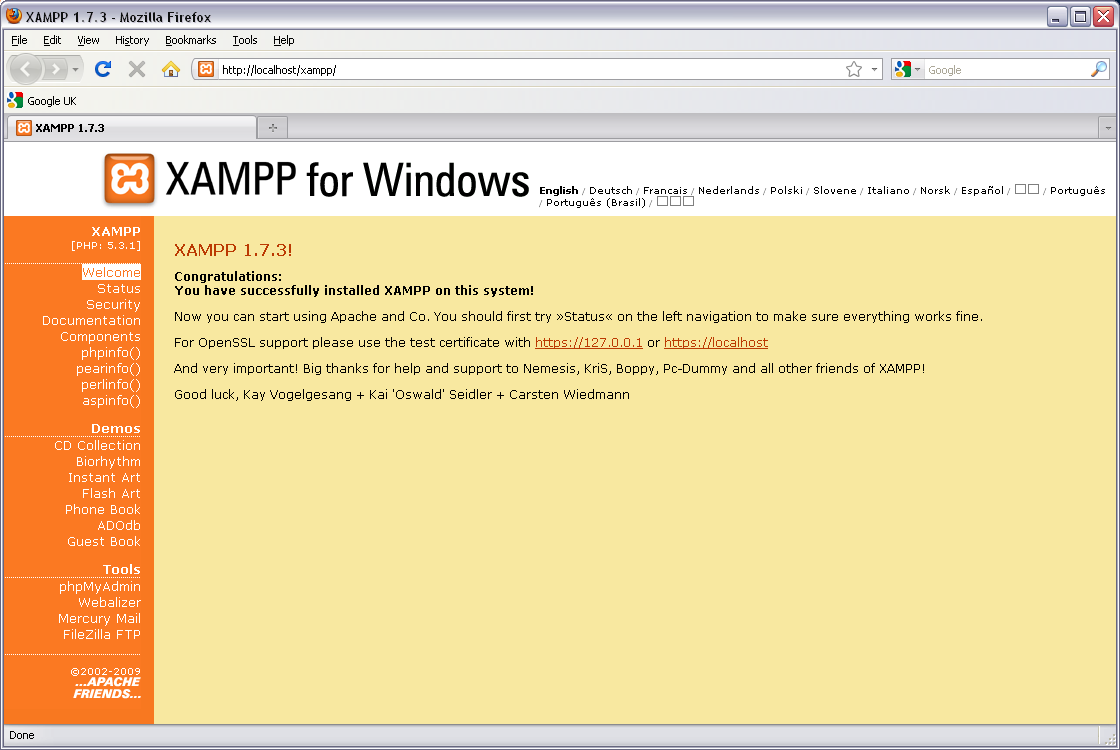
Apache ran as a standalone executable, the document root folder is located in the XAMPP installation directory under the usual name of ‘htdocs’. Once started, we were able to access the XAMPP Admin panel via a browser (not to be confused with the control panel!).
The admin panel is basically a bunch of clever PHP located in the ‘xampp’ folder of the ‘htdocs’. It allows you to view the status of all aspects of XAMPP, and access other management tools such as phpMyAdmin, Mercury Mail and FileZilla FTP.
A quick dig around the ‘apache’ folder reveals that all the XAMPP customizations are located in the ‘httpd-xampp.conf’ file, which provides aliases for phpMyAdmin, and other tools located outside the document root folder. We can also see that PHP has been installed as a module, and the .phps source file extension has been added for PHP files.
A nice little touch added to the configuration for Apache was the order directives applied to all XAMPP URL’s which prevents access from IP’s not in a local subnet. This should reduce the risk of accidently putting XAMPP on the Internet.
Apache also is SSL ready, listening on port 443 and presents a self signed SSL certificate (with a common name of ‘localhost’). This can be easily replaced with your own certificate.
MySQL
MySQL is arguably the package which catches most admin’s out, and XAMPP makes easy work of its unusual setup, though it is an insecure setup – with no root password configured. Once started, you can either manage the service through phpMyAdmin, or use your own MySQL tool to connect to the server via port 3306.
MySQL comes configured with 5 databases, including the usual ‘test’, ‘phpmyadmin’ and ‘mysql’ ones. We had a little trouble interpreting the ‘readme’ file in regards to setting a default password, which states the command \xampp\mysql\bin\mysqladmin.exe –u root –psecret would change the root password to secret. In fact the command was:
\xampp\mysql\bin\mysqladmin.exe –u root –p password secret
This changes the password to ‘secret’, when prompted; simply enter a blank line as the default password is blank.
Other than that, MySQL worked perfectly. As with Apache, adding it as a service via the ‘Svc’ button enabled MySQL to start automatically.
FileZilla
Adding an FTP server to the collection is a nice little touch and enables easy remote access to the htdocs folder, as well as an incoming anonymous folder for random storage. Taking a look in the xampp\passwords.txt file provides you with the account details that were created on setup, already configured with a home directory of htdocs. However you’re free to create other users.
The Server starts as a standalone application using the /compat and /start switch which XAMPP passes to FileZilla, other than this, the configuration is very much the same as a basic FileZilla installation.
Mercury and Tomcat
XAMPP tops off all these applications with Mercury Mail Transport System, enabling your website to send emails. The admin interface isn’t the most friendly I’ve seen, but it does listen on imap, SMTP and POP ports, which PHP is already configured to interact with using the mail() function.
We weren’t really interested in trying out Tomcat because out VMWare installation interfered with it, but with the basic Apache service running, we weren’t’ far off having a full java platform.
Overall
If I had to sum up XAMPP, I’d go with lifesaver. It really does take the pain out of configuring these applications separately when you’re in a hurry to test out code (and at the same time, makes it seem so easy). If you really are looking to just focus on your code and not your server config, then XAMPP is for you.
However if you do intend on doing some serious web hosting, I would advise taking the time to learn the applications individually, and install as such – giving the experience and understanding of how they all work, and how to separate secure them. It will also make upgrades much easier as you can pick and choose which applications need updating and when, without worrying about the others.
You can find XAMPP over at http://www.apachefriends.org/en/index.html, and finally, a special thanks to the authors Kay Vogelgesang, Kai ‘Oswald’ Seidler and Carsten Wiedmann for making such as useful tool.
